To change your label size used by the Sign-In App, you need to login here.
You can then modify the following:
Setting up site template
The site template is the default badge that will be printed when visitors sign into the app. You can customise this from Manage > Sites > Select site > Badges and then click the picture of the badge.
Setting up a group-specific template
From Manage > Groups > Select group > Badges, you can pick a template for a specific group. Badges set for groups will override the site template.
QR codes
QR codes can be printed on both standard and repeat visitor badges.
Troubleshooting
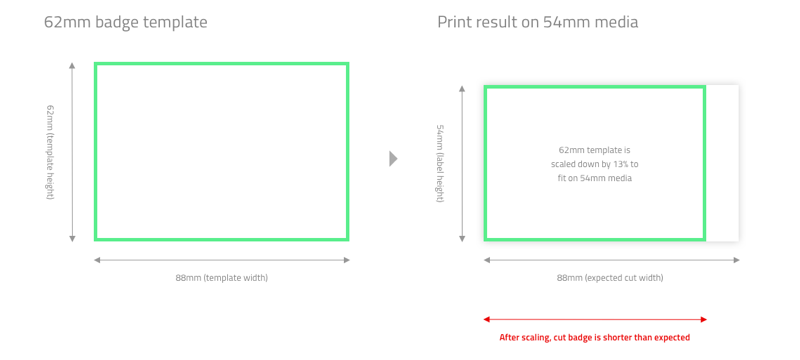
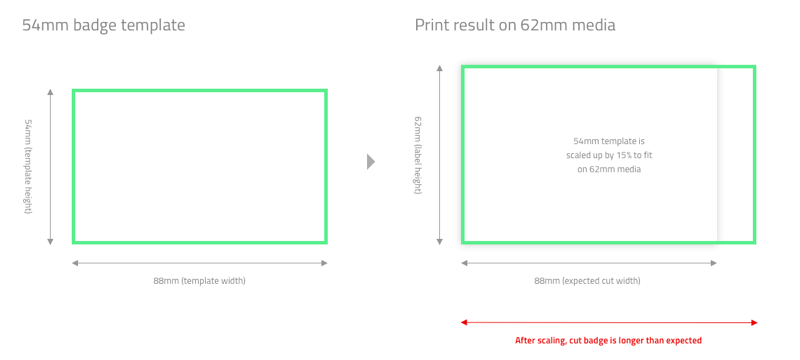
There are two types of media supported by compatible Brother printers, sticky media (62mm) and plain paper (54mm). If your printed badge size isn’t right or doesn’t fit your badge holders, it might be that the template selected on the badge builder isn’t the correct size for the media you are using. Both Sticky and Plain paper badges are 88mm wide.
Using a 62mm template on non-adhesive 54mm height labels will cause the badge to be cut shorter than expected.

Using a 54mm template on sticky 62mm height labels will cause the badge to be longer than expected. If your badge doesn’t fit in the badge holder, this is often the issue.

Ensure that the template in the badge builder is aligned with the type of media you are using.
Turning off template mode
(QL-820NWB Only) - Recommended
Brother's QL-820NWB has a mode enabled as standard which can interfere with the smooth operation of Sign In App, so we recommend you turn this mode off as soon as you can.
Press the Menu button on the printer, then use the up or down arrow keys to cycle through until you reach Template Settings.
Press OK and then scroll to select Template Mode.
Use the arrow keys and OK button to set this to OFF and use the Menu button to return to where the date and time are shown.